Black Forest Icebox Cake Recipe
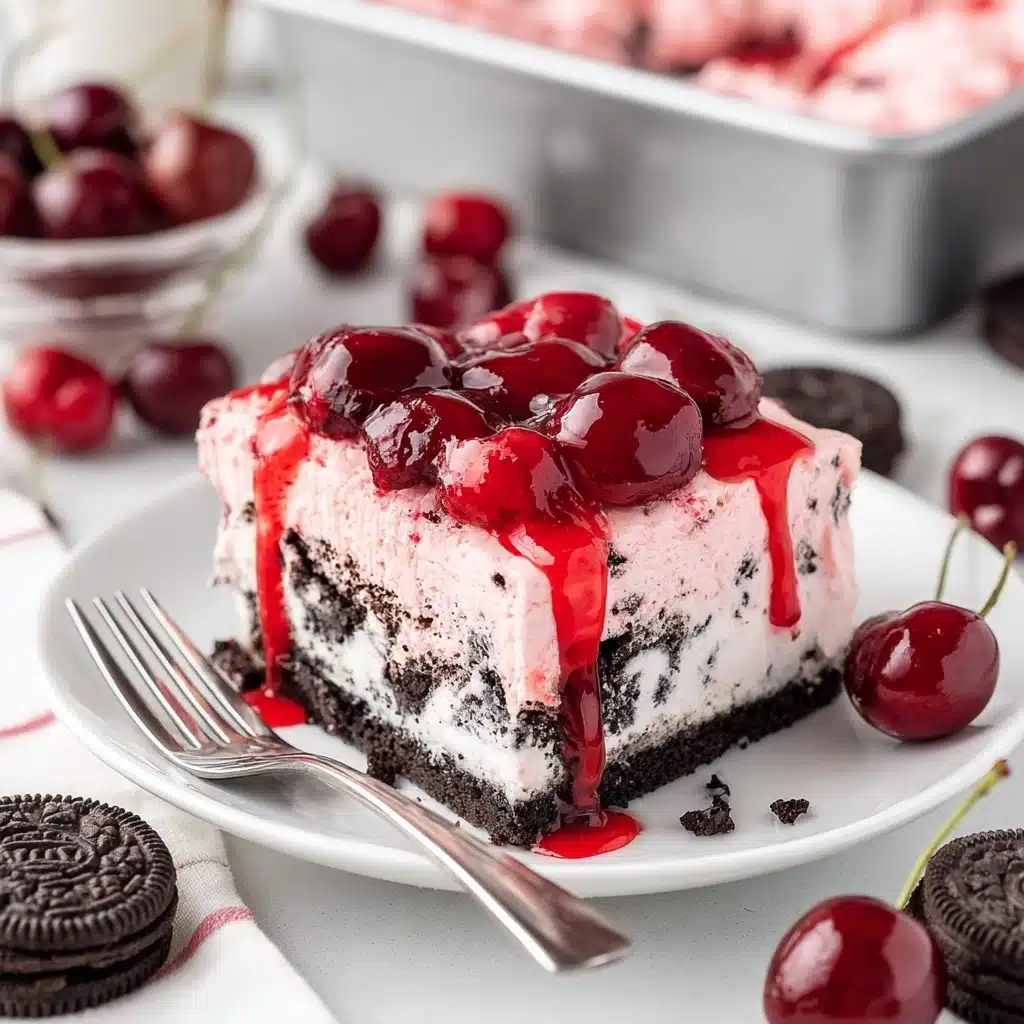
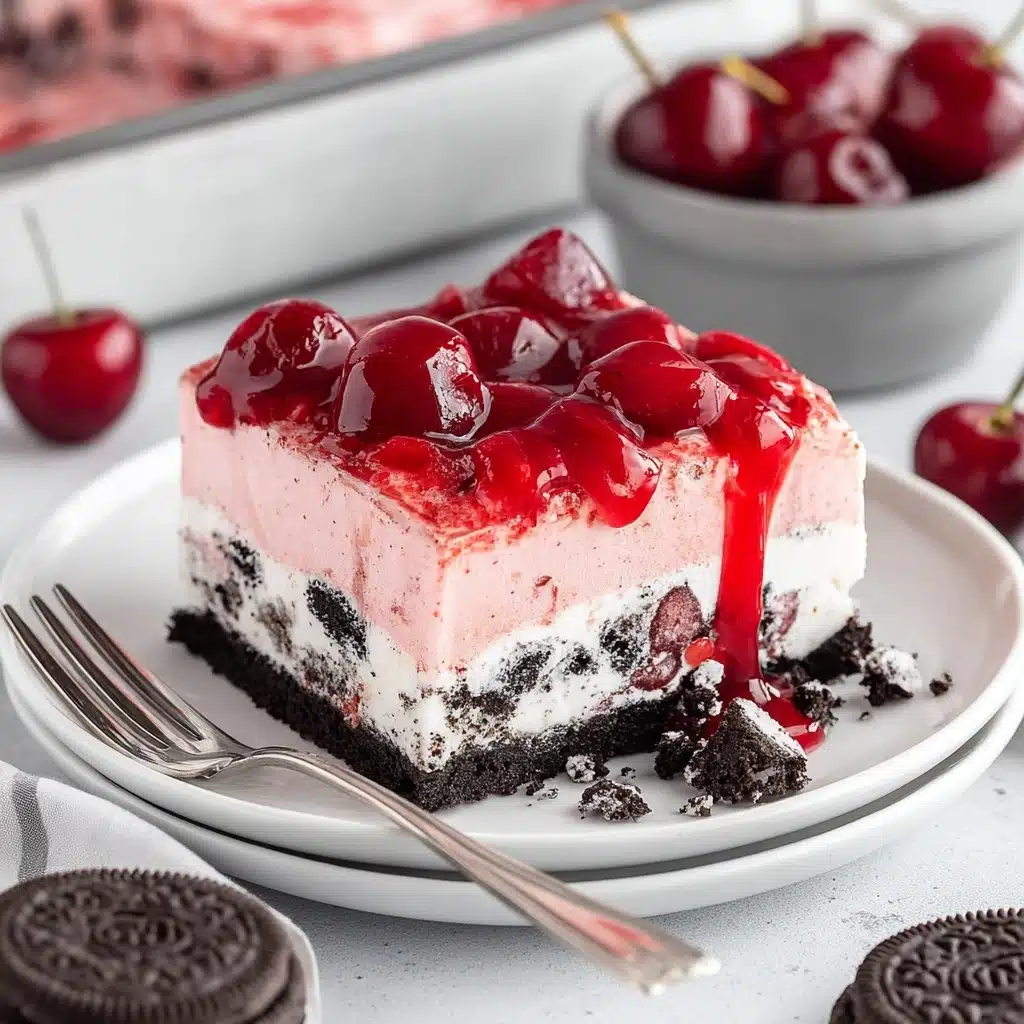
If you’re craving a dessert that feels like a slice of chocolate-cherry heaven, the Black Forest Icebox Cake is going to become your new best friend. This no-bake delight layers luscious cherry pie filling, fluffy whipped topping, creamy almond-scented cream cheese, and irresistible Oreo cookies, all chilled together to create a luscious, creamy treat with that perfect balance of textures and flavors. Whether you’re a fan of classic Black Forest cake or just love desserts that come together easily yet impress every time, this Black Forest Icebox Cake will sweep you off your feet with its rich, fruity, and chocolaty charm.
Ingredients You’ll Need
Getting this Black Forest Icebox Cake just right means gathering a few simple ingredients that work beautifully together. Each one brings a special touch: the cream cheese adds a creamy tang, chocolate cookies provide crunch and cocoa goodness, cherry pie filling brings sweetness and fruitiness, and whipped topping keeps everything light and airy.
- Cream cheese: Softened to room temperature for smooth blending and a rich, tangy base.
- Granulated sugar: Adds just the right amount of sweetness to balance the tartness of cherries.
- Pure almond extract: Brings that classic nutty note that makes this cake unmistakably Black Forest-inspired.
- Pure vanilla extract: Enhances all the flavors with warm, sweet undertones.
- Cherry pie filling: Provides the juicy, fruity layer that’s essential to the Black Forest flavor profile; divided to layer and garnish.
- Whipped topping: Thawed for fluffy texture and lightness, divided for layering and topping.
- Chocolate Oreo cookies: Crumbled to create cookie layers that add crunch and deep chocolate richness.
- Whole milk: Used to help soften the cookies so they meld perfectly with the cream mixture.
How to Make Black Forest Icebox Cake
Step 1: Prepare the Cream Cheese Mixture
Begin by beating together the softened cream cheese, granulated sugar, almond extract, and vanilla extract until the mixture is smooth and creamy. This aromatic and tangy base will give the cake its signature cozy flavor and velvety texture.
Step 2: Soften the Oreos
Pour the whole milk into a shallow dish and briefly dip each Oreo cookie into it, just enough to soften without making them soggy—this step is crucial as it transforms the cookies into tender layers that soak up the creamy filling beautifully.
Step 3: Assemble the Layers
In a large trifle bowl or deep glass dish, start with a layer of milk-softened Oreos, followed by a generous spread of cream cheese mixture, then a layer of cherry pie filling, and finally a layer of whipped topping. Repeat these layers until you run out of ingredients, ending with a whipped topping layer to keep it light and appealing.
Step 4: Chill to Set
Cover your assembled cake tightly and place it in the refrigerator for at least 4 hours, or overnight if possible. Chilling allows the flavors to meld and the cookies to soften further, creating that melt-in-your-mouth texture that makes this Black Forest Icebox Cake irresistible.
How to Serve Black Forest Icebox Cake
Garnishes
Before serving, add some extra cherry pie filling on top for a burst of color and juicy sweetness. A few whole Oreo cookies or chocolate shavings can also be scattered across the surface for added texture and visual appeal that will wow your guests instantly.
Side Dishes
This cake pairs wonderfully with a simple cup of freshly brewed coffee or a cold glass of milk. If you want to complement the fruity and chocolatey notes, try serving it alongside fresh raspberries or a scoop of vanilla ice cream for an extra indulgent pairing.
Creative Ways to Present
If you want to impress even further, assemble the Black Forest Icebox Cake in individual clear glasses or jars. The layers look stunning through the glass and make for perfect single-serving desserts at parties or family gatherings.
Make Ahead and Storage
Storing Leftovers
After serving, cover any leftover Black Forest Icebox Cake tightly with plastic wrap or store in an airtight container. Keep it refrigerated and consume within 3 to 4 days for the best texture and flavor.
Freezing
You can freeze portions of this cake by wrapping them well and placing in a freezer-safe container. Thaw overnight in the fridge before serving; keep in mind the texture may be slightly softer after freezing, but the delicious flavors will hold up nicely.
Reheating
This dessert is best enjoyed chilled, so reheating is not recommended. Instead, simply let frozen slices thaw gently in the fridge and enjoy the creamy, cool indulgence as intended.
FAQs
Can I use different cookies instead of Oreos?
Absolutely! While Oreo cookies provide a classic chocolate flavor and distinctive crunch, you can experiment with other chocolate sandwich cookies or even chocolate chip cookies to craft your own twist on the Black Forest Icebox Cake.
Is it necessary to dip the cookies in milk?
Dipping the cookies in milk softens them just enough to create a creamy, cake-like texture when chilled. However, if you prefer a crunchier bite, you can skip this step, but keep in mind it will change the overall mouthfeel.
Can I make this cake dairy-free?
Yes! Substitute the cream cheese and whipped topping with dairy-free alternatives, and opt for milk substitutes like almond or oat milk for dipping the cookies. The cake will still be delicious with these adjustments.
How long should the cake chill in the fridge?
At least 4 hours of chilling is needed to allow the layers to meld and the cookies to soften perfectly. For the best results, chilling it overnight is ideal.
Can I prepare Black Forest Icebox Cake ahead of time for a party?
Definitely! It’s one of the best make-ahead desserts because the flavors actually improve as it chills. Prepare it the day before your event to save time and impress your guests with a stunning, flavorful dessert.
Final Thoughts
Making a Black Forest Icebox Cake is like giving yourself a delicious little gift—easy to assemble, rich in flavor, and perfect for any occasion where you want to dazzle without stress. Once you try this recipe, I’m sure it’ll become a beloved staple in your dessert lineup. So go ahead, dive into the layers of chocolate, cherries, and creamy goodness, and enjoy every bite of this irresistible treat!
PrintBlack Forest Icebox Cake Recipe
This Black Forest Icebox Cake is a decadent no-bake dessert featuring layers of Oreo cookies, luscious cherry pie filling, and creamy whipped topping mixed with cream cheese and almond extract. Perfect for warm days, this rich and creamy cake offers the classic flavors of Black Forest cherry and chocolate in an easy, refrigerator-set recipe that requires no baking.
- Prep Time: 20 minutes
- Cook Time: 0 minutes
- Total Time: 6 hours 20 minutes (includes chilling time)
- Yield: 12 servings 1x
- Category: Dessert
- Method: No-Bake, Refrigerator Set
- Cuisine: American
- Diet: Vegetarian
Ingredients
Cream Cheese Mixture
- 8 ounce package of cream cheese (softened to room temperature)
- 5 tablespoons granulated sugar
- ½ teaspoon pure almond extract
- ¼ teaspoon pure vanilla extract
Cherry Pie Filling
- 42 ounce (2 21-ounce) cans cherry pie filling (divided into 1¼ cups and remainder)
Whipped Topping
- 16 ounce (2 8-ounce) containers whipped topping (thawed, divided into 3 cups, ¼ cup, and remainder)
Cookies and Milk
- 50 chocolate Oreo cookies (family-size package, approx. 20 ounces)
- ⅔ cup whole milk
Instructions
- Prepare the cream cheese mixture: In a large mixing bowl, beat the softened cream cheese with granulated sugar until smooth and creamy. Add almond extract and vanilla extract, mixing well to combine for a rich, flavorful base.
- Separate cherry pie filling: Measure out 1¼ cups of cherry pie filling and set aside. Reserve the rest of the filling for layering later in the cake.
- Divide whipped topping: Portion out 3 cups, ¼ cup, and reserve the remainder of the whipped topping for various layers.
- Dip Oreos in milk: Pour ⅔ cup whole milk into a shallow bowl. Quickly dip each Oreo cookie into the milk for about 1 second to soften slightly without making them soggy.
- Layer the cake: In a rectangular or square glass dish (approx. 9×13 inches), arrange a single layer of milk-dipped Oreo cookies. Spread half of the reserved cherry pie filling evenly over the cookies. Add half of the cream cheese mixture on top, spreading it gently. Then, layer 1 cup of whipped topping evenly.
- Repeat layering: Place another layer of milk-dipped Oreos over the whipped topping, followed by the remaining cherry pie filling, the rest of the cream cheese mixture, and another cup of whipped topping.
- Top layer: Finish with a final layer of Oreos and the reserved whipped topping (approximately 1 cup). Use the ¼ cup of whipped topping to pipe decorative dollops on top if desired.
- Chill the cake: Cover the assembled cake with plastic wrap and refrigerate for at least 6 hours or overnight to allow the cookies to soften and flavors to meld, creating a mousse-like texture.
- Serve and enjoy: Once chilled and set, slice the cake into portions and serve cold for a refreshing, indulgent dessert.
Notes
- Use full-fat cream cheese and whole milk for best flavor and texture.
- Do not over-soak Oreos in milk to prevent sogginess; a quick dip is sufficient.
- Chilling overnight enhances flavor and texture significantly.
- This recipe can be made a day in advance, making it perfect for entertaining.
- Store leftovers covered in refrigerator and consume within 3 days for optimal freshness.
Nutrition
- Serving Size: 1 slice (approx. 1/12th of cake)
- Calories: 350 kcal
- Sugar: 30 g
- Sodium: 210 mg
- Fat: 22 g
- Saturated Fat: 12 g
- Unsaturated Fat: 7 g
- Trans Fat: 0.5 g
- Carbohydrates: 35 g
- Fiber: 2 g
- Protein: 4 g
- Cholesterol: 45 mg
Keywords: Black Forest Icebox Cake, no-bake dessert, Oreo cake, cherry pie filling dessert, refrigerator cake, easy dessert recipe